 Your Bizarre Adventure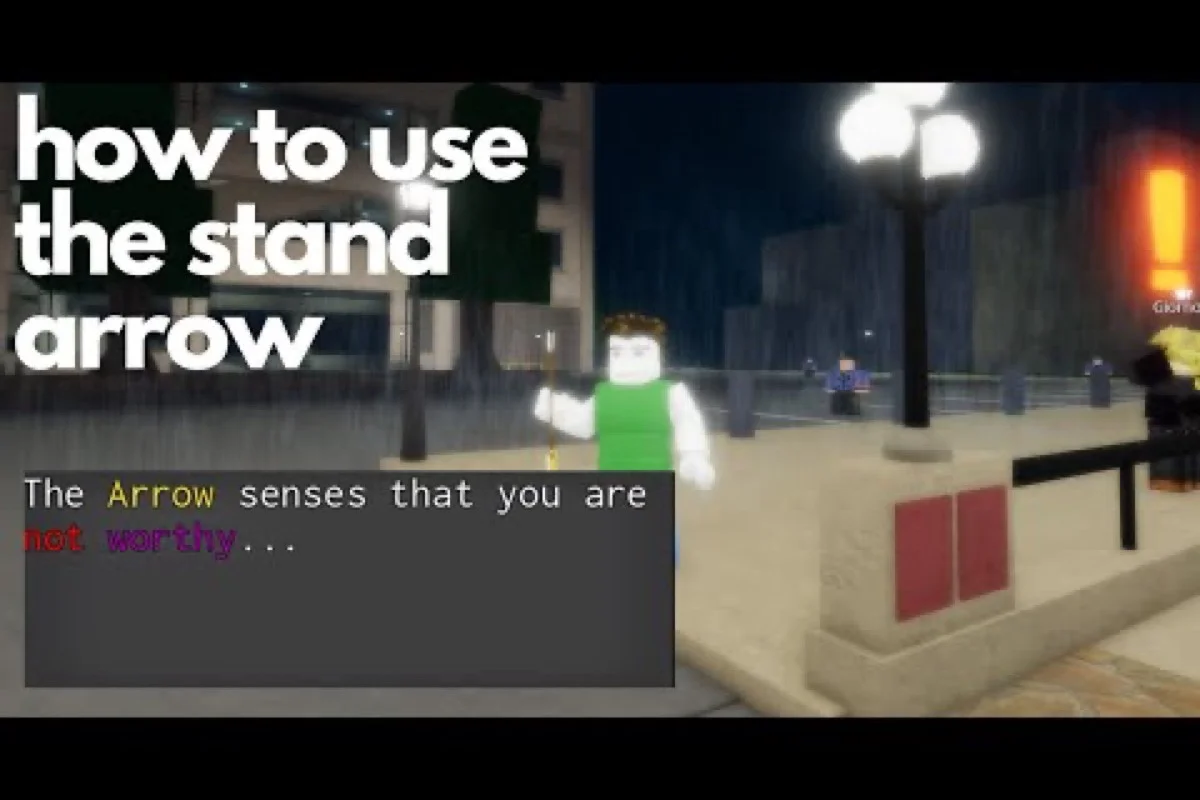
The YBA stand arrow not worthy message is the rejection you get when an arrow-type item fails the hidden Worthiness check in the skill tree. Every arrow-class item in the game — Mysterious Arrow, Lucky Arrow, and each Saint's Corpse piece — runs through that same gate, which is why a high-level character with no points in the Worthiness branch can still be turned away. This guide explains how to clear the threshold, how to reroll into a Stand you actually want, and where Suno and Isabelle hand out the Requiem Arrow.
What the Not Worthy Message Actually Means
Hitting a "Not Worthy" prompt after using a Mysterious Arrow in Your Bizarre Adventure is one of the most common brick walls new players run into. The arrow disappears from your inventory, no Stand is granted, and the screen throws a denial message in red. According to the official Trello documentation, every arrow-class item in YBA — Mysterious Arrow, Lucky Arrow, Ribcage, Heart, Left Arm, and Pelvis — requires the player to meet a hidden Worthiness threshold in the Stand skill tree before the roll can resolve. Worthiness is unlocked by spending skill points along a specific branch, which is why a Level 30 character with zero points invested in that tree still gets rejected, while a Level 12 player who dumped points into the right nodes can succeed.
The message is not a bug and it is not a probability miss. It is a gating check that runs before the random roll ever happens, so a "Not Worthy" result tells you nothing about how lucky your arrow would have been. For anyone grinding toward a specific Stand, this distinction matters: rerolling arrows before unlocking Worthiness wastes the entire item, and because Mysterious Arrows have a stack cap of 25, burning ten arrows as a Level 5 newbie means ten fewer chances once you finally do qualify. The community consensus, repeatedly echoed on the official Discord, is that players should always confirm their Worthiness unlock before picking up or buying a Mysterious Arrow from another player.
There is also a related frustration that newcomers confuse with Not Worthy: a roll that resolves but grants a Stand the player immediately dislikes. Both situations funnel into the same solution path — the Rokakaka reroll loop — but the mechanics underneath are different. Understanding that split is the foundation for any serious YBA Stand progression, and it sets up the rest of the decisions in this guide: how to unlock Worthiness, when to spend a Rokakaka, and which evolutions are worth chasing once you finally land a base Stand you actually want to keep.
Unlocking Worthiness and the First Arrow Pull
The first real milestone for any new player is unlocking the Worthiness node in the Stand skill tree. The official Trello confirms Worthiness exists but does not publish a specific point cost, leaving exact values to community testing. Community data gathered across thousands of players places the unlock somewhere between 5 and 15 skill points invested in the right subtree, depending on whether the player chose the "Worthiness I" entry node or jumped straight to a higher tier. Players earn 2 skill points per level, so reaching Worthiness is usually feasible by Level 8 to Level 12 if points are focused rather than spread across combat moves.
The recommended path is to spend the first eight levels dumping nearly every point into the Worthiness branch and ignoring flashy damage skills. Combat effectiveness at Level 10 is already mediocre no matter what skills you have, because base damage scales with the Stand you do not yet have. Worthiness, on the other hand, gates every single roll for the rest of the character's life until Prestige. It is the highest-leverage investment in early YBA progression, and according to community testing on the official Discord, players who delay it often burn through 5 to 10 Mysterious Arrows before they finally learn why nothing resolves.
Worthiness vs. Pity System
A second system works alongside Worthiness and is worth understanding early. The official Trello describes a Pity counter that guarantees a successful roll once it climbs high enough, and the published numbers are clear: the standard Pity ceiling is 10%, but spending Robux on the Stand reroll developer product raises that ceiling to 20% for that session. A successful Lucky Arrow roll adds a flat 90% to the Pity counter, and any shiny skin pull resets the counter back to zero. Pity persists across servers, so logging out does not lose progress.
| System | Trigger | Max Effect | Persists? |
|---|---|---|---|
| Standard Pity | Repeated failed rolls | Caps at 10% | Yes, cross-server |
| Boosted Pity | Buy reroll dev product | Caps at 20% | Per session |
| Lucky Arrow bonus | Successful Lucky Arrow pull | Adds 90% to counter | Yes, until reset |
| Shiny reset | Pull a shiny Stand skin | Resets Pity to 0% | New cycle starts |
The Pity mechanic means that even players who technically meet Worthiness can stall at unlucky low-percentage Stands for a long time, which is exactly where the reroll loop comes in.
How to Reroll Stands in YBA (Rokakaka Method)
Rerolling a Stand in YBA is built around one item: the Rokakaka. According to the official item documentation, using a Rokakaka removes the player's current Stand, removes their selected fighting style, and refunds every skill point spent. The cap is 25, they are tradable, and they appear in random map spawns at a rate noticeably lower than Mysterious Arrows. The item exists specifically as the reroll tool, and understanding its full cost is the difference between efficient progression and grinding in circles.
The reroll procedure is straightforward but punishing if rushed. Players must use the Rokakaka on themselves, which strips the Stand and fighting style instantly, then use a Mysterious Arrow to roll a fresh Stand. Because the Mysterious Arrow also costs an inventory slot, the reroll loop burns two item slots per cycle: one Rokakaka and one arrow. The whole sequence is sometimes called the "Stand reroll" in community shorthand, and it is the canonical answer to the question of how to reroll Stand outcomes in YBA.
| Reroll Step | Item Cost | Effect | Reversible? |
|---|---|---|---|
| 1. Use Rokakaka | 1 Rokakaka | Removes Stand + fighting style, refunds skill points | No |
| 2. Use Mysterious Arrow | 1 Mysterious Arrow | Rolls a new Stand from the pool | No |
| 3. (Optional) Use Pure Rokakaka | 1 Pure Rokakaka | Resets skill tree only, keeps Stand | No |
| 4. Re-equip fighting style | Style item + teacher NPC | Restores boxing, hamon, spin, etc. | No |
There is a cheaper variant that players sometimes miss. The Pure Rokakaka is rarer than the standard Rokakaka, but it only resets the skill tree and refunds points — it does not remove the Stand. According to the official Trello, Pure Rokakaka is the correct item when a player is happy with their current Stand but wants to reallocate points into a different build. Many new players waste standard Rokakakas on Pure Rokakaka situations, which is one of the most common economy mistakes reported in the community.
Selling Unwanted Arrows at ShiftPlox
Not every arrow needs to be used. The travelling merchant ShiftPlox accepts a wide range of items in exchange for in-game cash, and the published buy prices are stable across the community. Players who pull a low-tier Stand they have no intention of keeping can liquidate the extra arrows for a small profit, then buy a Rokakaka from another player to reroll without burning personal inventory.
| Item | ShiftPlox Buy Price | Mysterious Arrow Equivalent Value |
|---|---|---|
| Mysterious Arrow | $200 | 1.0x baseline |
| Rokakaka | $600 | 3.0x |
| Pure Rokakaka | $1,500 | 7.5x |
| Stone Mask | $1,000 | 5.0x |
| Gold Coin | $120 | 0.6x |
| Diamond | $500 | 2.5x |
| Steel Ball | $1,000 | 5.0x |
| Ribcage | $1,200 | 6.0x |
| Heart | $2,500 | 12.5x |
The economic lesson is that Rokakakas are worth three Mysterious Arrows at the merchant, and Pure Rokakakas are worth seven and a half. New players who ignore the merchant and just stockpile arrows in their inventory usually end up inventory-capped with nothing useful to show for it, because the Mysterious Arrow cap of 25 hits fast.
The YBA Evolved Stands Roadmap
Once a player has a base Stand they actually want to keep, the next progression layer is Stand evolution. According to the official Trello, the game supports three distinct evolution paths, and each path uses a different item or quest chain. Confusing the three is a common early-game mistake that costs players valuable resources, so it is worth memorizing the full list before committing to a long grind.
The first path is the Requiem Arrow route. This is the most famous evolution method in the community because it produces the four iconic Requiem Stands. Official sources confirm the evolution pairs: Star Platinum evolves into Star Platinum: The World, Killer Queen becomes Killer Queen: Bites The Dust, Gold Experience becomes Gold Experience Requiem, Silver Chariot becomes Chariot Requiem, and King Crimson becomes King Crimson Requiem. The requirement is Prestige I plus Worthiness, and the item is capped at 5 per character and not tradable, which is why every Requiem Arrow is precious.
The second path is the Corpse Parts route. This path is for Part 7 and Part 8 Stands, which do not use arrows. Official documentation lists four evolutions: the Heart of the Saint's Corpse turns D4C into D4C: Love Train and turns Red Hot Chili Pepper into Chili Pepper Alternate Universe, the Left Arm turns a Spin-buffed Tusk ACT 1 into Tusk ACT 2, and the Pelvis turns Tusk ACT 3 into Tusk ACT 4. These parts are bought from NPCs, won in SBR, or traded with other players.
The third path is the Quest Chain route. Official quests handle the most narratively important evolutions. The Green Baby from Pucci's first quest turns Whitesnake into C-Moon; the Stand Virus Capsule from Enya The Hag's quest turns The World into Shadow The World; combining Dio's Diary with Dio's Bone turns The World into The World Over Heaven; and a long chain involving Jotaro's Disc and Weather Report's Disc ultimately unlocks Weather Report as a separate Stand rather than an evolution of Whitesnake.
| Evolution Path | Source | Base Stand | Final Form | Tradeable? |
|---|---|---|---|---|
| Requiem Arrow | Item | Star Platinum | Star Platinum: The World | Item not tradable |
| Requiem Arrow | Item | Killer Queen | Killer Queen: Bites The Dust | Item not tradable |
| Requiem Arrow | Item | Gold Experience | Gold Experience Requiem | Item not tradable |
| Requiem Arrow | Item | Silver Chariot | Chariot Requiem | Item not tradable |
| Requiem Arrow | Item | King Crimson | King Crimson Requiem | Item not tradable |
| Heart | NPC / SBR | D4C | D4C: Love Train | Yes |
| Heart | NPC / SBR | Red Hot Chili Pepper | Evolves into Chili Pepper Alternate Universe | Yes |
| Left Arm | NPC | Tusk ACT 1 (with Spin) | Tusk ACT 2 | Yes |
| Pelvis | NPC | Tusk ACT 3 | Tusk ACT 4 | Yes |
| Green Baby | Pucci quest | Whitesnake | C-Moon | No |
| Stand Virus Capsule | Enya quest | The World | Shadow The World | No |
| Dio's Diary + Dio's Bone | Quest | The World | The World Over Heaven | No |
| Weather Report's Disc | Jotaro [6] drop | (N/A) | Weather Report (unlock) | N/A |
According to the official Trello, Tusk ACT 3 is the only evolution in the entire list that requires a specific named Worthiness tier: Worthiness V. Players chasing the Part 7 evolution chain should plan accordingly, because reaching Worthiness V typically requires a much higher skill-point investment than the base Worthiness unlock.
The YBA Requiem Stand List and SBR Strategy
The Requiem Stands are a small but prestigious subset of the evolved roster. According to official sources, only four Stands qualify as true Requiem forms: Chariot Requiem, Crazy Diamond Requiem, Gold Experience Requiem, and King Crimson Requiem. Players sometimes conflate this list with the broader evolved list, but official material is clear: a Stand only counts as Requiem if it was produced by a Requiem Arrow. The three additional evolutions produced by Dio's Diary, the Stand Virus Capsule, and the Corpse Parts are powerful, but they belong to separate evolution families.
The main path to a Requiem Arrow is a multi-step quest that begins at the Steel Ball Run Starting Line. According to official documentation, players must speak with Prestige Master Rin at the SBR starting line sheriff's office to begin the quest, and the inventory must be empty of Requiem Arrows at the time of activation. The next steps are: place 1st, 2nd, or 3rd in any SBR race, return to Isabelle the Arrowsmith, and pay $7,500 along with one Mysterious Arrow. Isabelle then trades the Mysterious Arrow for a Requiem Arrow, which is the only sanctioned quest-based way to earn one. Since the Requiem Arrow belongs to a particular tier of stand variant, it helps to know how that tier compares to others, as outlined in our Yba Stands Rarity breakdown of where Requiem Stands sit within the overall rarity hierarchy.
Suno the Arrowsmith (Alternate Route)
There is a second NPC who can grant a Requiem Arrow: Suno the Arrowsmith. The official Trello confirms that Suno provides Requiem Arrows under specific conditions, and the community treats this as a fallback path for players who cannot reliably place top-three in SBR. Exact quest prerequisites for Suno are not fully detailed in the official documentation, but players report that Suno requires Worthiness plus an in-game cash payment similar to Isabelle's fee. Because the SBR quest is officially documented end-to-end, it remains the more reliable route for new players.
The two routes differ in time investment more than reward. SBR requires learning the course, finding a horse, surviving Blessings and Revolver duels, and finishing in the top three, which can take 20 to 60 minutes per attempt depending on server population. Suno's route is faster but less documented, and reports of her spawn schedule vary across community testing. For players who already have a Spin build, the SBR route also awards Horse Feed on victory, which compounds the value.
SBR Stage Spawn Rates for the Requiem Quest
The Requiem Arrow quest requires the player to win an SBR race. SBR itself has seven stages with published spawn rates, and knowing them helps players plan the grind. According to the official Trello, two stages are guaranteed spawns and the rest are probabilistic.
| Stage | Boss or Notable Mob | Spawn Rate |
|---|---|---|
| Starting Line | (Race start) | 100% |
| Snowy Cave | Random enemy | 20% |
| Bloody Fields | Random enemy | 20% |
| The Plains | Random enemy | 20% |
| The Forest | Random enemy | 20% |
| The Desert | Random enemy | 20% |
| NYC Bridge | (Race finish) | 100% |
Players chasing the Requiem Arrow SBR quest should treat the 20% spawn windows as the limiting factor, because skipping a stage costs a full race cycle. The official community Discord repeatedly advises running SBR in low-population servers to reduce competition, which is the opposite of the usual "more players, more action" intuition from the rest of the game.
Frequently Asked Questions
Why does YBA keep saying I am not worthy when I use a Mysterious Arrow?
The Not Worthy message means your character has not spent enough skill points along the Worthiness branch in the Stand skill tree. Worthiness is a hidden requirement that gates every arrow-class item, including Lucky Arrows and the four Corpse Parts. The official Trello confirms Worthiness exists but does not publish the exact point cost, so community testing places the unlock between 5 and 15 points, reachable around Level 8 to 12 if points are focused.
What is the fastest way to reroll my Stand in YBA?
The canonical reroll method is to use a Rokakaka on yourself to remove your current Stand and fighting style, then use a Mysterious Arrow to roll a new Stand. Each reroll cycle costs one Rokakaka and one Mysterious Arrow from your inventory, and Rokakakas can also be bought from other players since they are tradable. If you only want to respec skills and keep the same Stand, use a Pure Rokakaka instead.
Which Stands can actually evolve into Requiem forms in YBA?
Only five Stands can evolve through a Requiem Arrow, and the official Trello lists them precisely: Star Platinum becomes Star Platinum: The World, Killer Queen becomes Killer Queen: Bites The Dust, Gold Experience becomes Gold Experience Requiem, Silver Chariot becomes Chariot Requiem, and King Crimson becomes King Crimson Requiem. The broader YBA evolved stands list also includes forms like C-Moon, Shadow The World, and D4C: Love Train, but those come from quest chains and Corpse Parts, not Requiem Arrows.
Where do I get a Requiem Arrow outside the SBR quest?
The second official path is through Suno the Arrowsmith, an NPC who can grant a Requiem Arrow under specific conditions confirmed by the official Trello. Exact prerequisites for Suno are not fully published, but the quest typically requires Worthiness plus cash. The main SBR quest through Prestige Master Rin and Isabelle the Arrowsmith is the more fully documented path, especially for new players chasing the YBA Requiem stand list.
Does Pity carry over if I switch servers, and what resets it?
Yes, Pity persists across servers and even across logouts, which is critical for long reroll sessions. The standard cap is 10%, the Robux-boosted cap is 20%, and a successful Lucky Arrow pull adds a flat 90% to the counter. The only thing that resets Pity is rolling a shiny Stand skin, which starts the cycle over from zero, and the Pity counter only applies to standard Mysterious Arrows, not to Rokakaka or Pure Rokakaka rerolls.